These are the images I took, before I did image manipulation. I took these photos, because I thought I could use these images to make a new image. For example I was going to have a giant person peeking over a building, or a person riding bird.


Then I edited the levels of the image by going on Image > Adjustments > Levels
I just played around with the settings until I like the way the image looked


When I like the levels of the image I pressed ok and then I clicked on the Quick Selection Tool and selected the lion


 Then I clicked on the Edit in Quick Mask Mode button, that turned what was not selected red
Once I did that I pressed F on the keyboard, it got rid of the windows bar at the bottom and the top only leaving photoshop visible on the screen. Then I pressed F again and it turned every thing apart from the image black on the screen. This is good for focusing on the image, and concentrating. Then I pressed F again which turned the screen back to normal.


Then I used these tools to refine the selection, of the lion. To make it easier I pressed Ctrl and X on the keyboard, which switches the brush to the Eraser and Pen tool.


 After I have selected the areas I wanted on the image, I saved the selection so I could use that selection again if i needed to for that image. I did this by clicking on Select > Save Selection. I then named the selection lion and pressed OK.


I then went on Edit > Copy > Edit > Paste


 Once I have done that, the selected lion will be copied onto another layer.
  Then I click on the Clone Stamp Tool, so I can edit the image, because I want to get rid of the lion, on the original image, and make it look like the lion was never there. I had to also clone parts of the trees so, that the image looks more natural. To do that I pressed Alt on the keyboard and clicked on the area I wanted to copy and then click on the area wanted to put that copied area, using it like the brush tool. The plus on the image below is what is being copied.
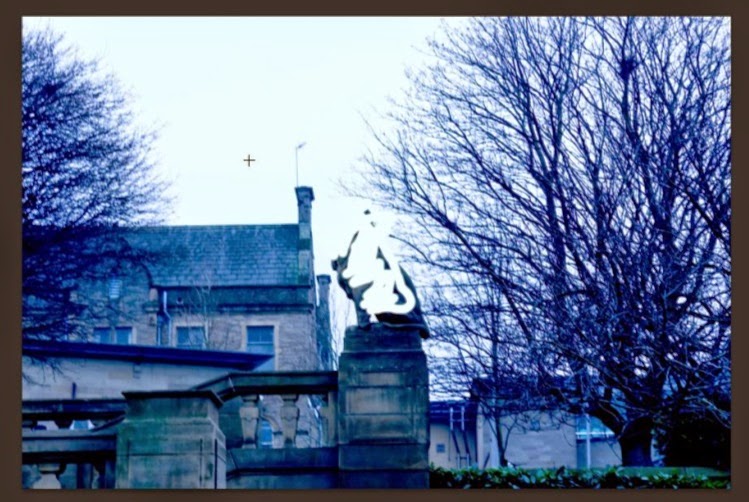


Then I created an animation, by moving the lion on different layers.


No comments:
Post a Comment